How to export Adobe Premiere to MP4 the best way?
If you plan on using the best quality for your videos, you need to know how to export Adobe Premiere to MP4 file. Also, you should know that as one of the most popular video editing applications, Adobe Premiere Pro 2021 is quite expensive.
Although this software is on the luxury side, editing YouTube videos is unmatched with loads of options of its nonlinear editing interface. It is the software for professional video editing. And if you plan on making next-level videos, you need to familiarize yourself with the basic options of this software.
Besides learning how to export Adobe Premiere to MP4, you can read more about these software options. Also, continue reading to find out which technical issues can occur when importing and exporting videos with Adobe Premiere.
On this page:
What are the best video formats to export from Adobe Premiere for YouTube, Vimeo, etc.?
Adobe Premiere Pro 2021 supports a wide variety of different formats and presets for exporting. If you’re unsure which video format you should choose for exporting your video, the high-definition option is H.264 or MPEG-4 Part 10.
That is the best answer on how to export Adobe Premiere to the MP4 file extension. Also, to make a choice even simpler, Adobe Premiere Pro has preset for popular platforms such as YouTube, Vimeo, Facebook, etc., when you choose H.264 format.
Also, there are additional presets for a range of quality from SD to 4K. Everything you need you’ll find in Adobe Premiere Pro preset list. As far the quality goes next best thing after H.264 is H.265 or HEVC format. However, this format is not as widely supported.
How to export Adobe Premiere to MP4 in few easy steps?
If you are a beginner at video editing, you’ll see how to export Adobe Premiere to MP4 easily and fast in Pro version 2021. Also, there are similar options for doing this in other Adobe Premiere Pro versions. If you are wondering is this software worth it, you can try it for seven days for free.
Step 1
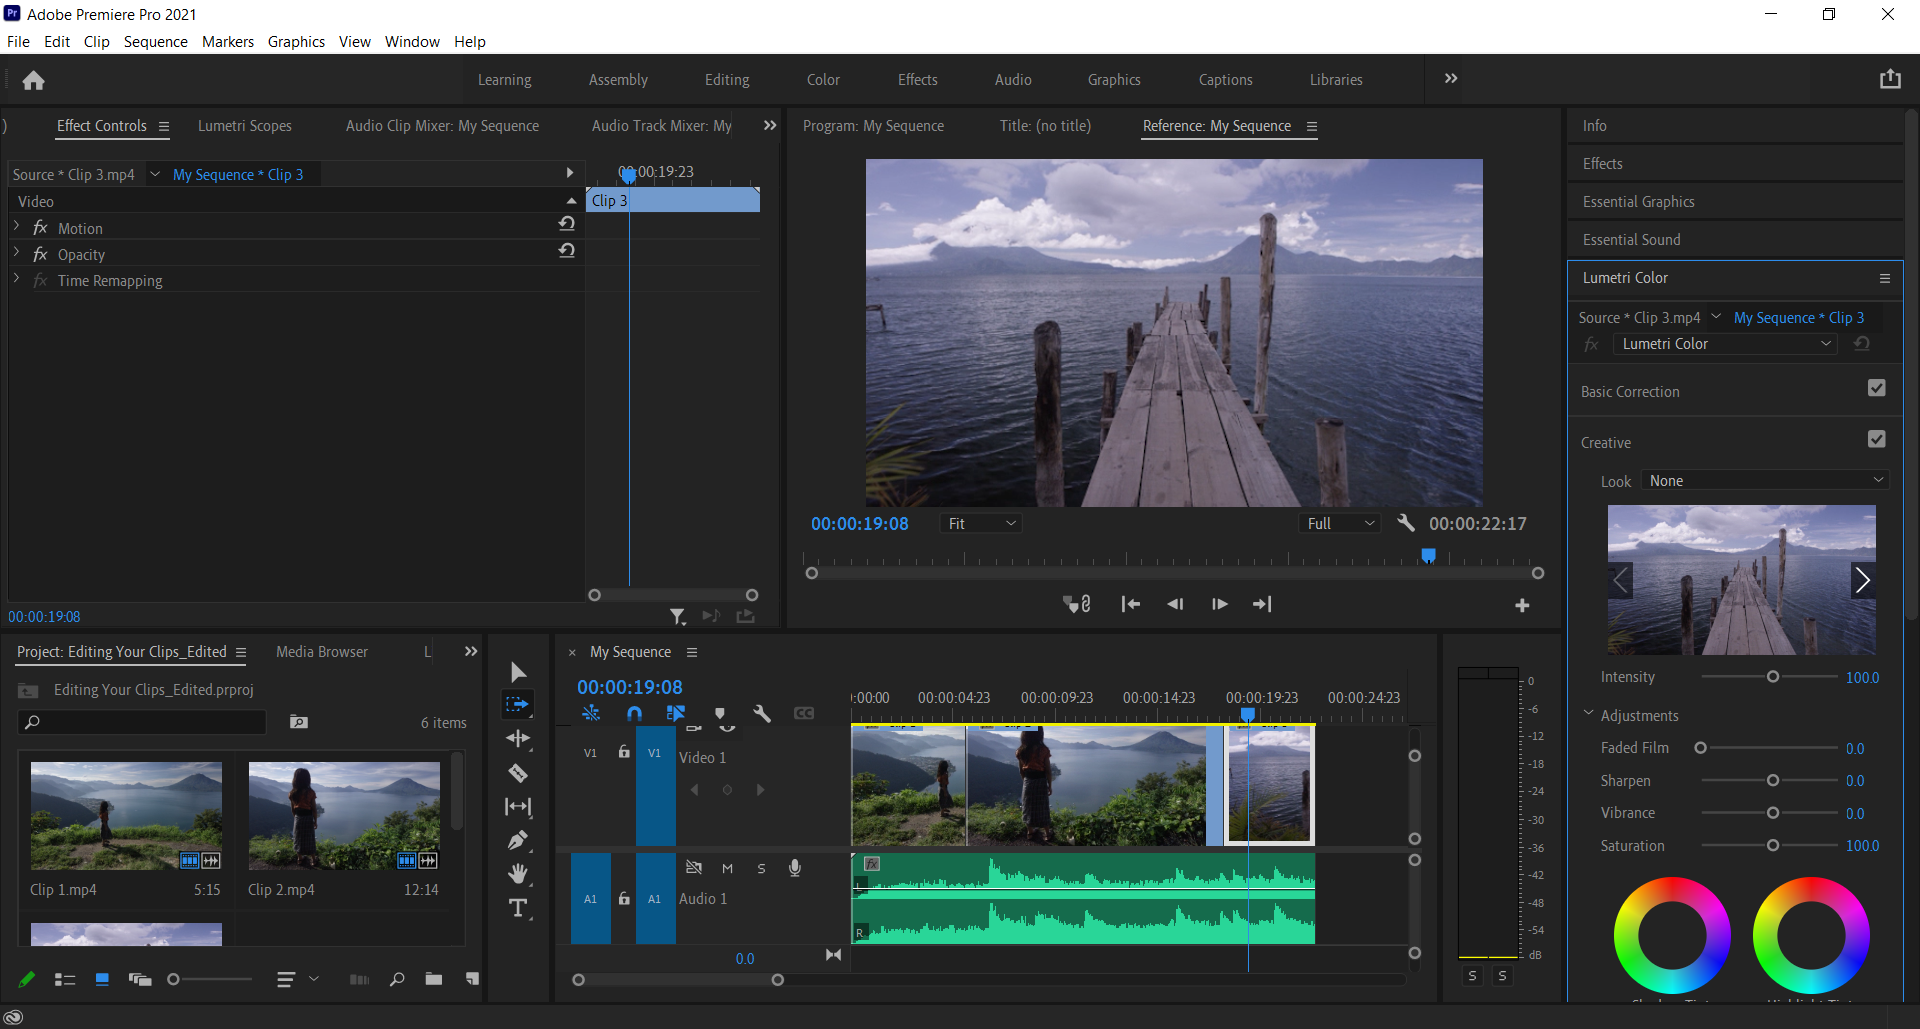
Open your saved project using Adobe Premiere Pro with the File menu Open option.
Step 2
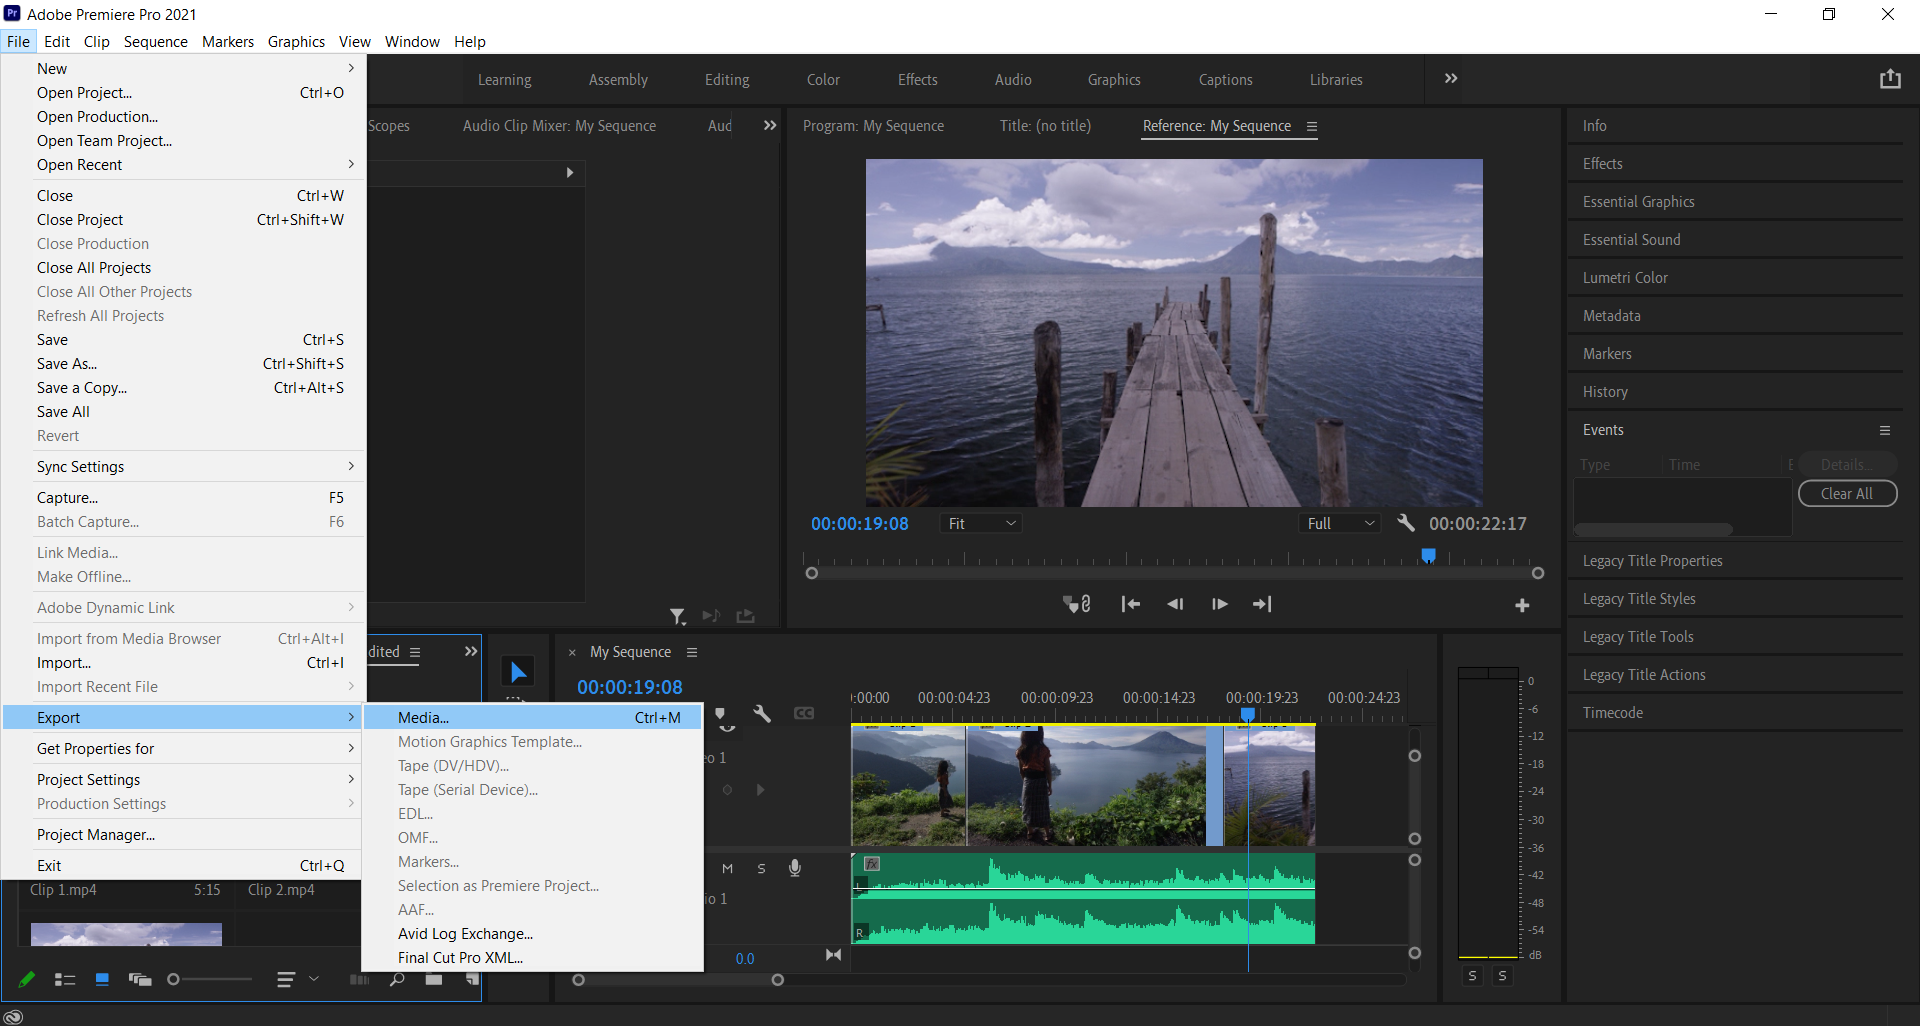
Under the File menu, select Export To drop-down list, and then choose option Media. Or you can use the keyboard shortcut CTRL and M for exporting options.
Step 3
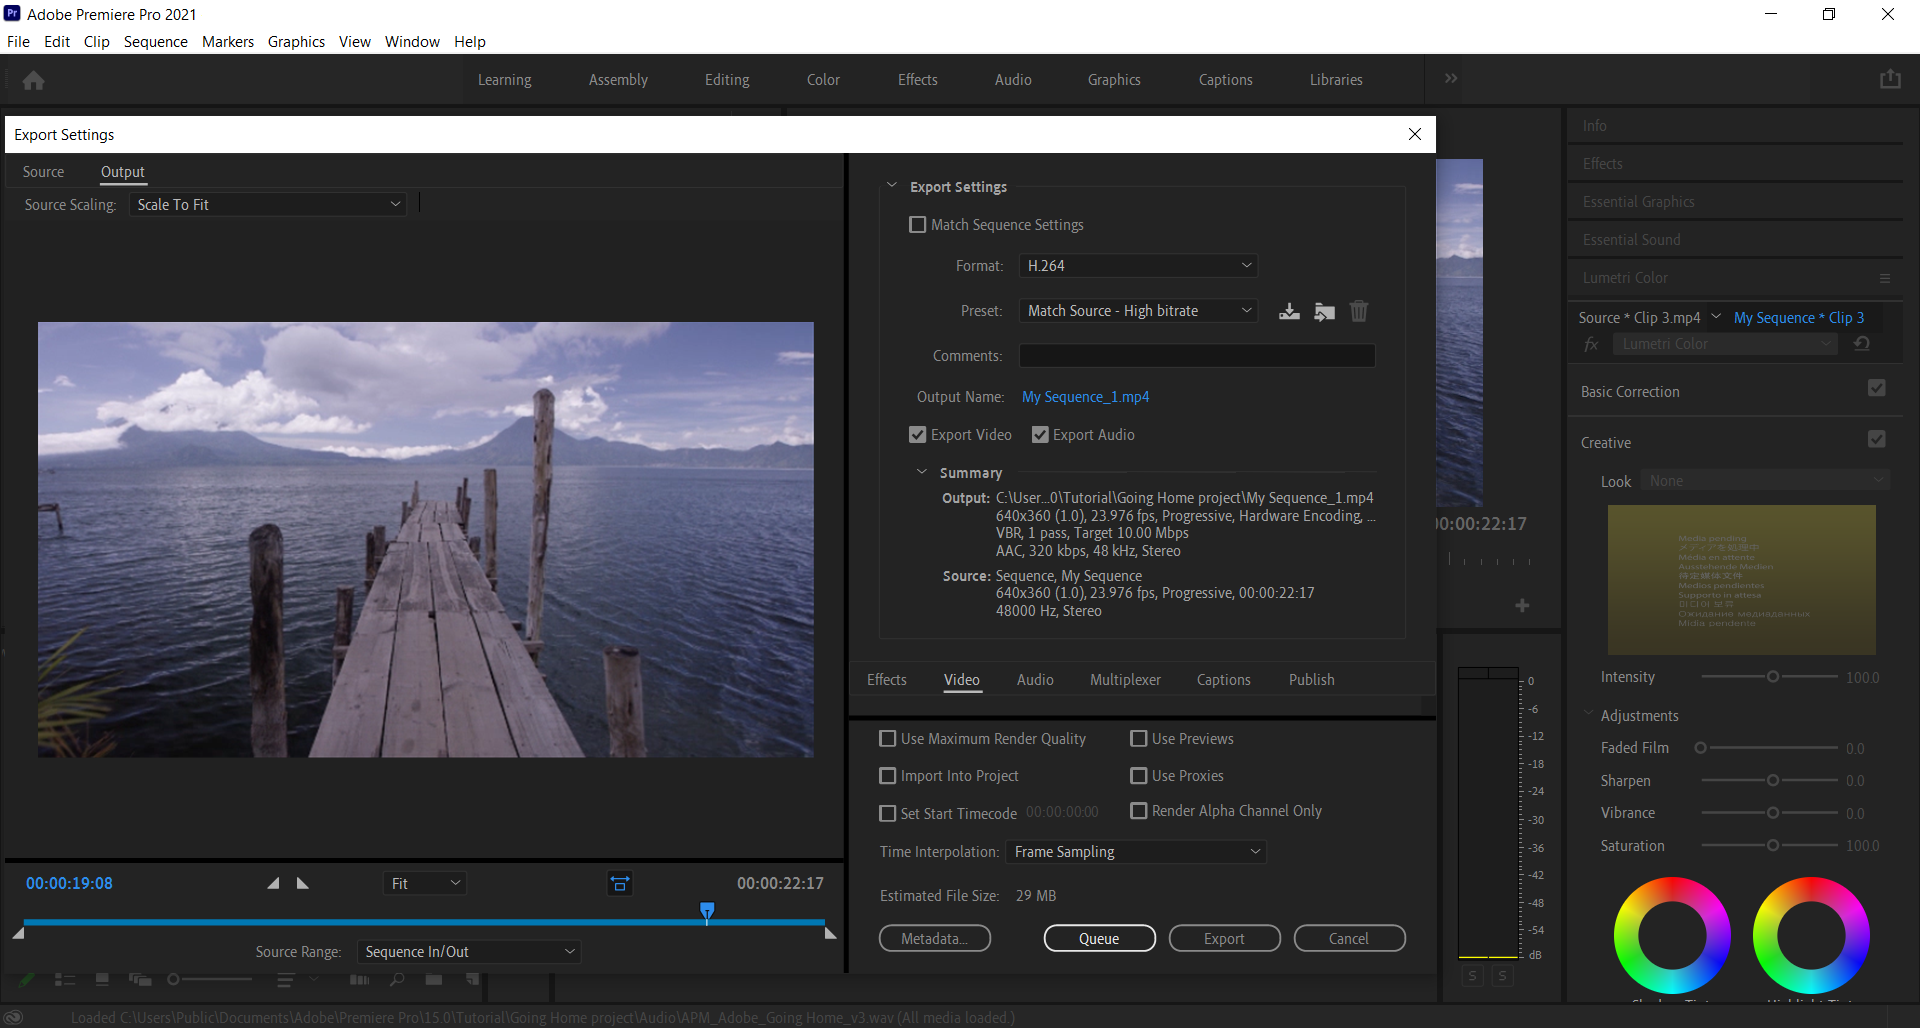
There are many options you can adjust before exporting your video. But for the MP4 file extension, you should change the format to H.264 for the highest quality. For a file with the MP4 file extension, you can also choose the MPEG4 format. The difference is that exported video will be of poor quality compared to H.264.
Step 4
Other settings and options you can adjust before exporting are below. However, you don’t have to change any other option and press the Export button right away.
What to do when there is no Export option in Adobe Premiere Pro?
A common issue when using Adobe Premiere Pro is finding the option that you need. Sometimes Export option can be gray or unavailable. To get this option to work, check if you saved your project. Another reason could be not enough available memory space for exported video.
Also, avoid using the external hard drive for exported videos, or else the same error can occur. Check and fix these options, and try again to export your video to MP4, as explained.
How to choose presets in Adobe Premiere Pro 2021?
Besides choosing a format for exporting your video in Adobe Premiere, you can select Preset to get the video optimized for the exact purpose you need it. Some of the most popular platforms, such as YouTube and Vimeo, have different standards for getting the quality you want to show.
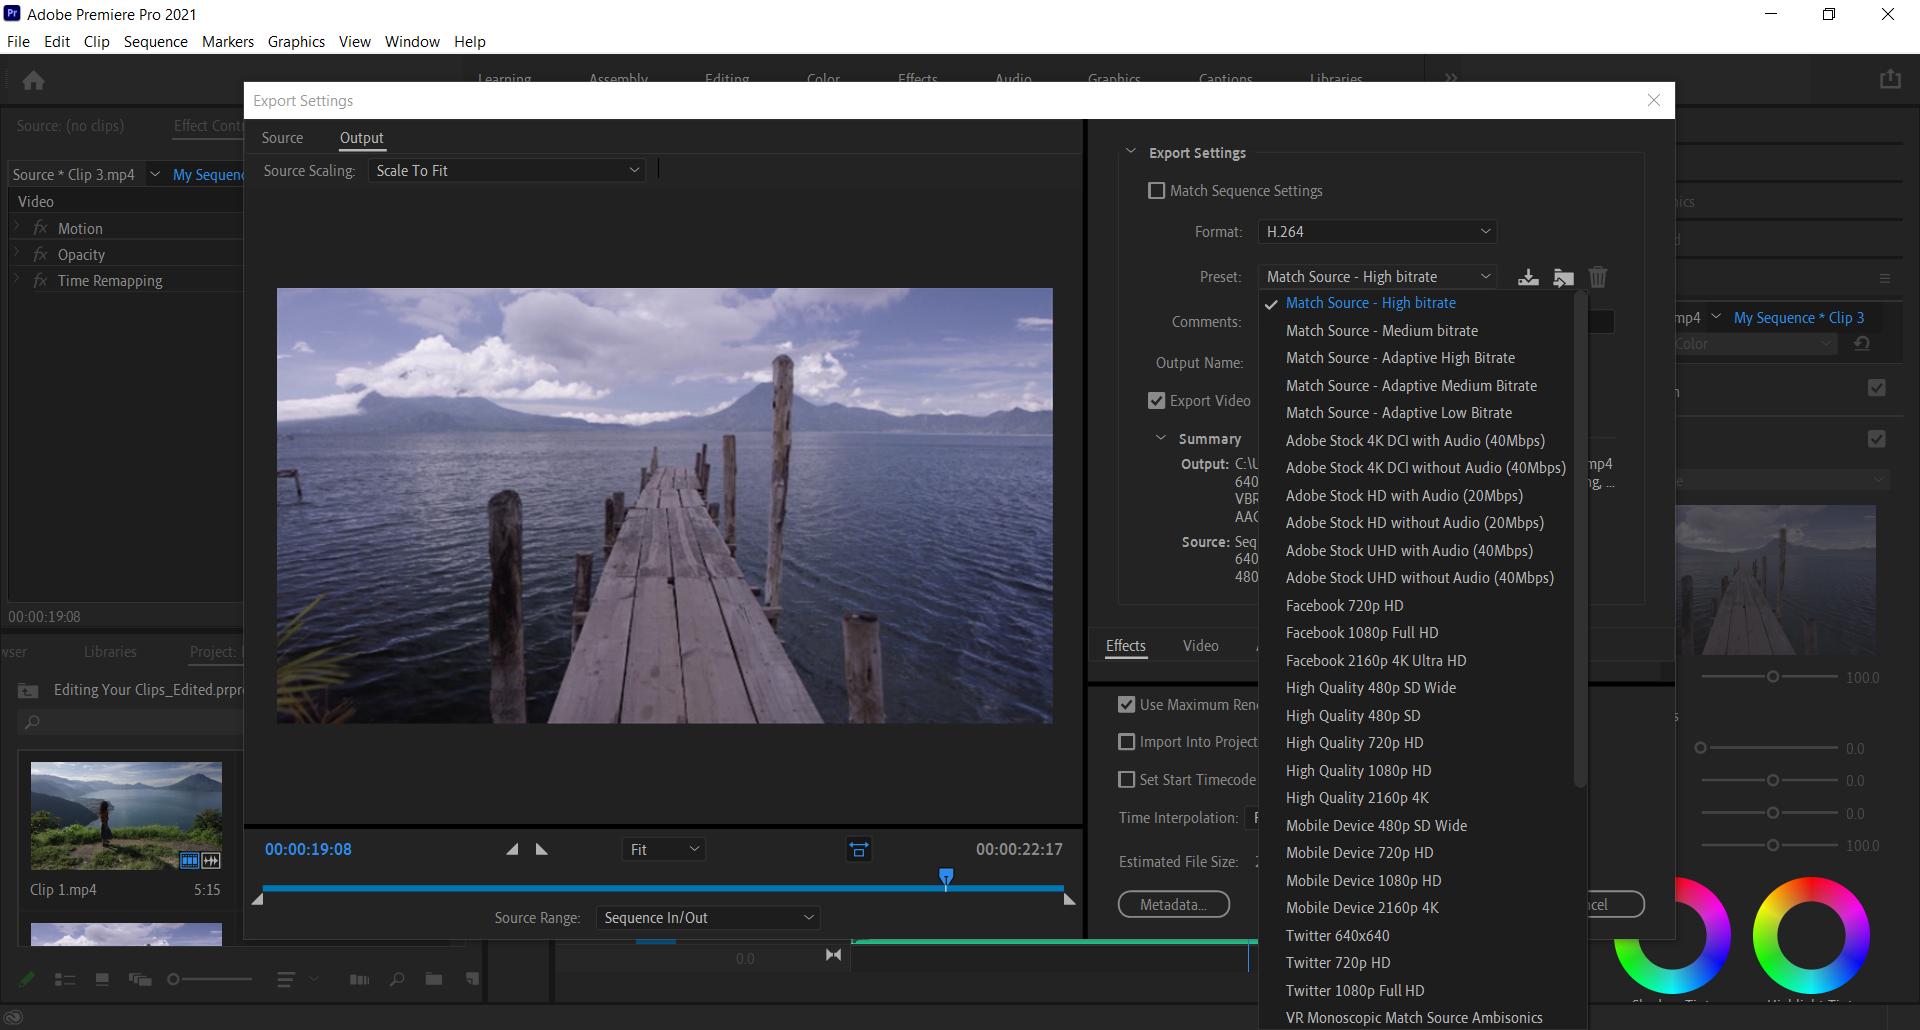
Right under the Format option in Exporting dialog box, there is the Preset drop-down list. For each format, these presets are different and adapted to your needs. H.264 format has many presets for YouTube, Vimeo, Facebook, Twitter, etc., with quality options for 4K, HD, and SD.
You can even choose the higher quality video than your input file, and you can get it exported using Adobe Premiere Pro. With these presets and options, Adobe is far ahead of other video editing software.
Additional configuration options for exporting Adobe Premiere to MP4 file
Besides basic options for exporting videos, Adobe Premiere has a lot more to offer. After choosing the format and presets, you can enter a comment, change the output name, and more. But let’s begin at the top.
The first option you shouldn’t change is Match Sequence Settings. That box needs to remain unchecked.
If you need to add information for your exported file, you can enter a comment. That comment will show in the exported file properties with other metadata.
Next, you can use left-click on the Output name to change it. You’ll get a dialog box when you press this link. There you can also change the destination of the exported MP4 file.
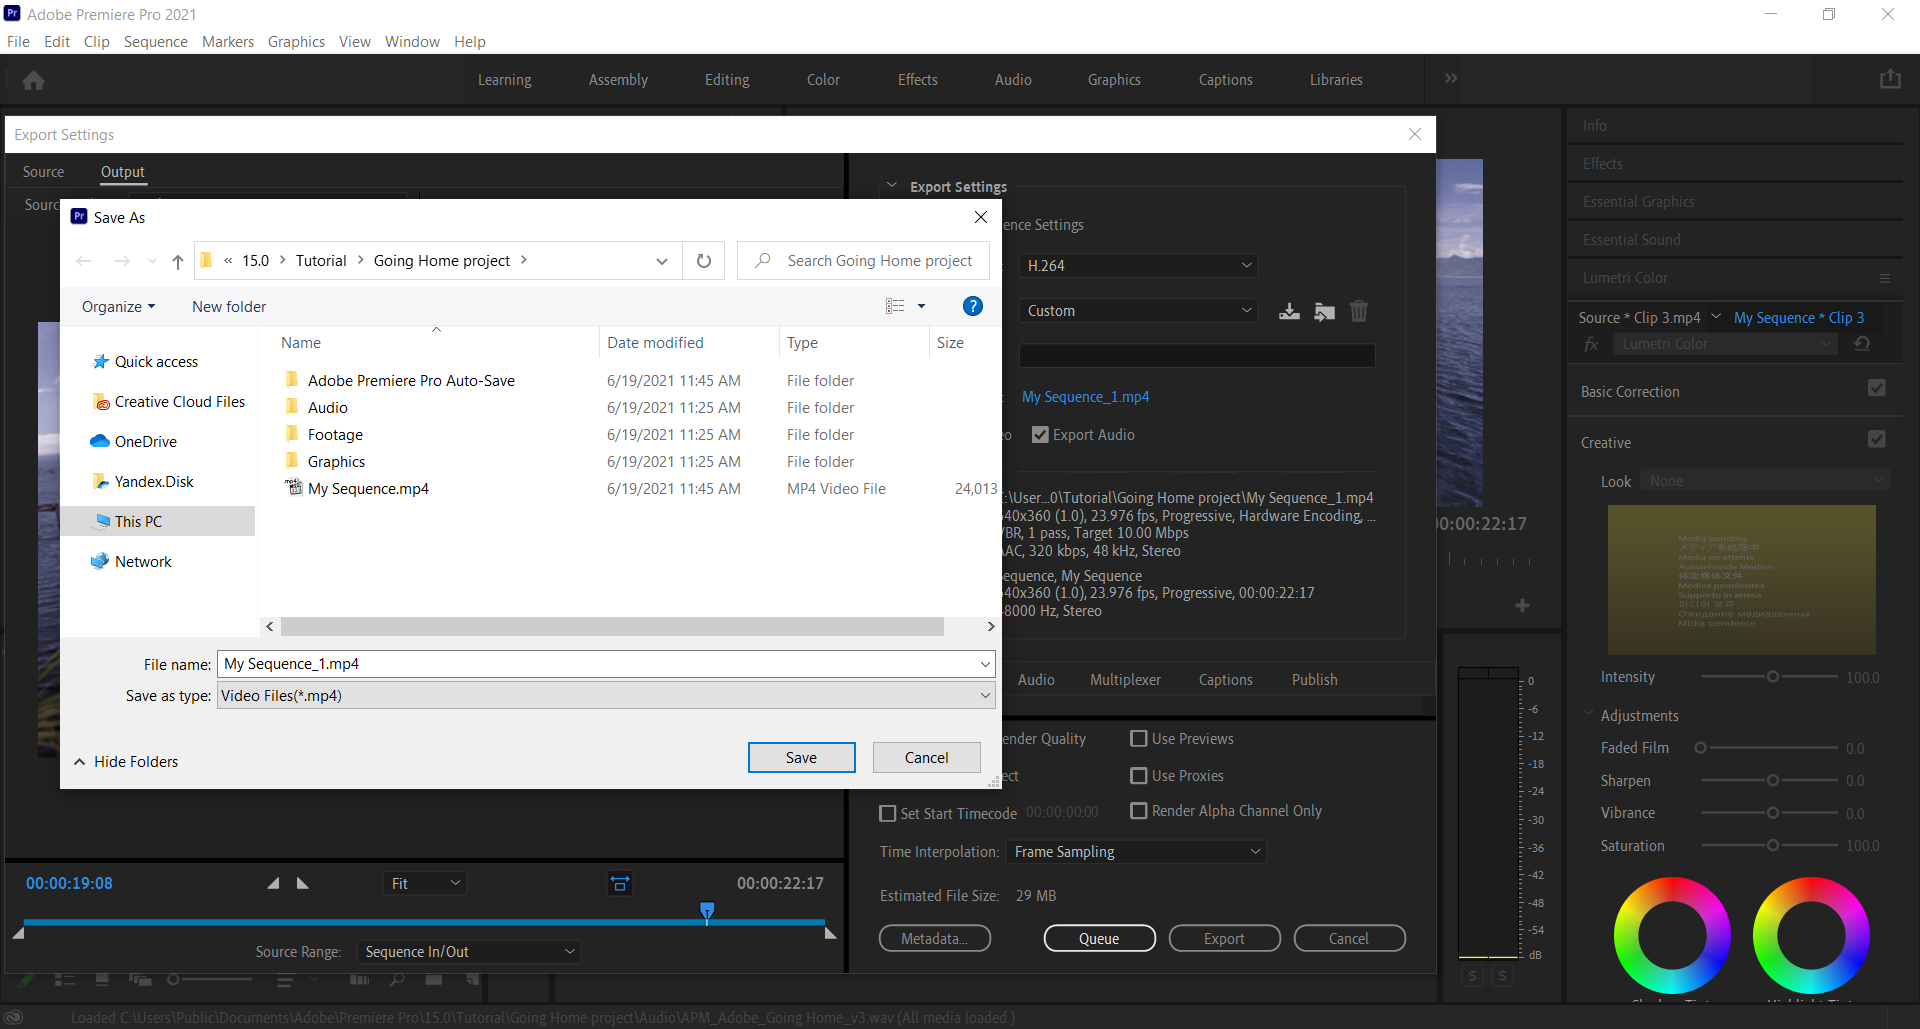
Other boxes you can check are Export Video and Export Audio. If you don’t have audio, you can leave that box unchecked.
You can also check the box to Use maximum Render Quality. That will ensure better scaling quality. However, that will also extend the encode time.
At the bottom of the Export dialog box, there is an estimated file size and some more options besides the Export button. The first one is Metadata, which opens a dialog box with all metadata and options on whether to keep them. The Queue button will open Adobe Media Encoder if you have it installed.
These are some of the reasons most successful YouTubers use Adobe Premiere Pro for editing their videos. With all options this tool has, you can edit all your videos on a professional level.
How to change Adobe Premiere video to any format for free online?
There are some limitations for Adobe Premiere Pro regarding the range of formats for exporting and importing files. If the video you want to export or import is not on the list, do not worry, we have an easy fix for this.
You can learn how to export Adobe Premiere to MP4 first. And use Converter365 for free to change your file format to any format you want. In another case, when the video you want to import to Adobe Premiere Pro is not supported, you can convert it to a desirable format with this tool.
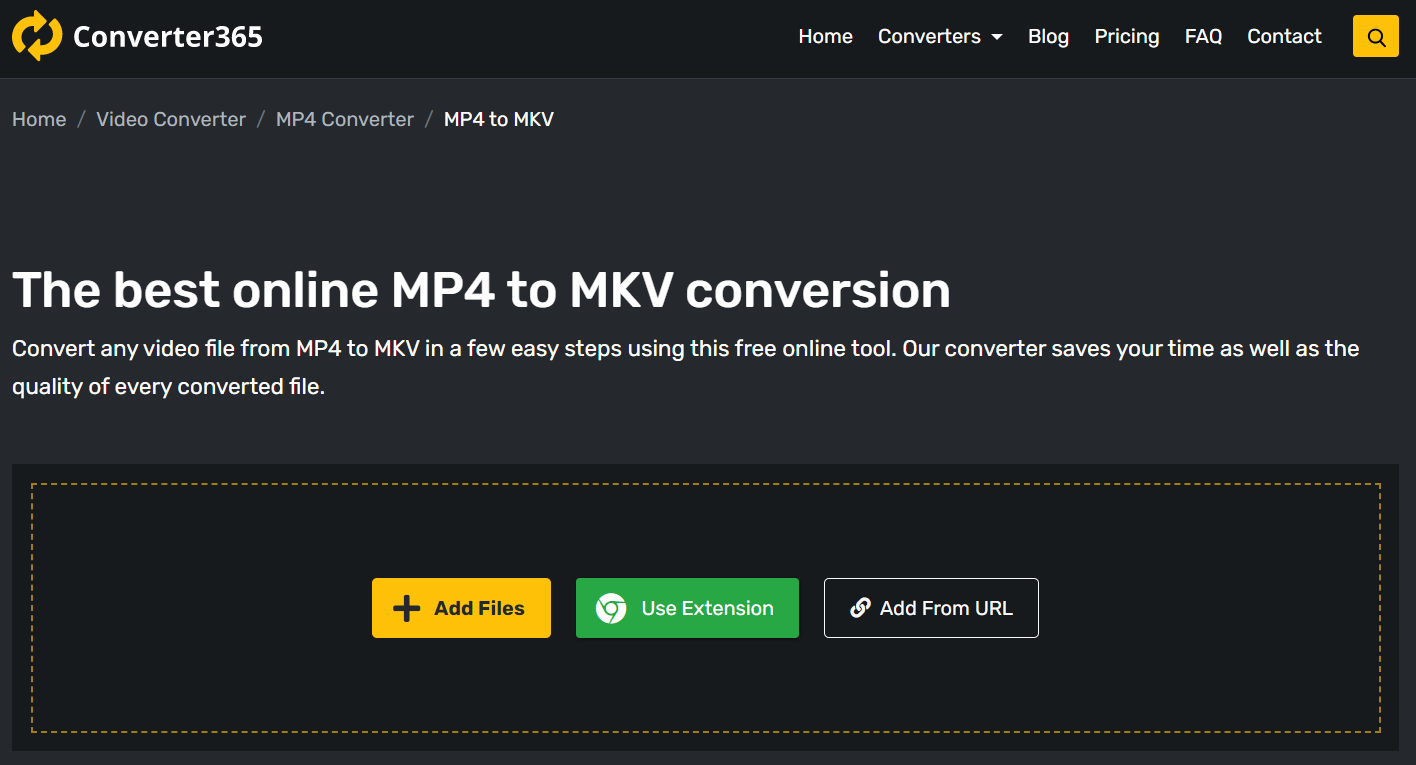
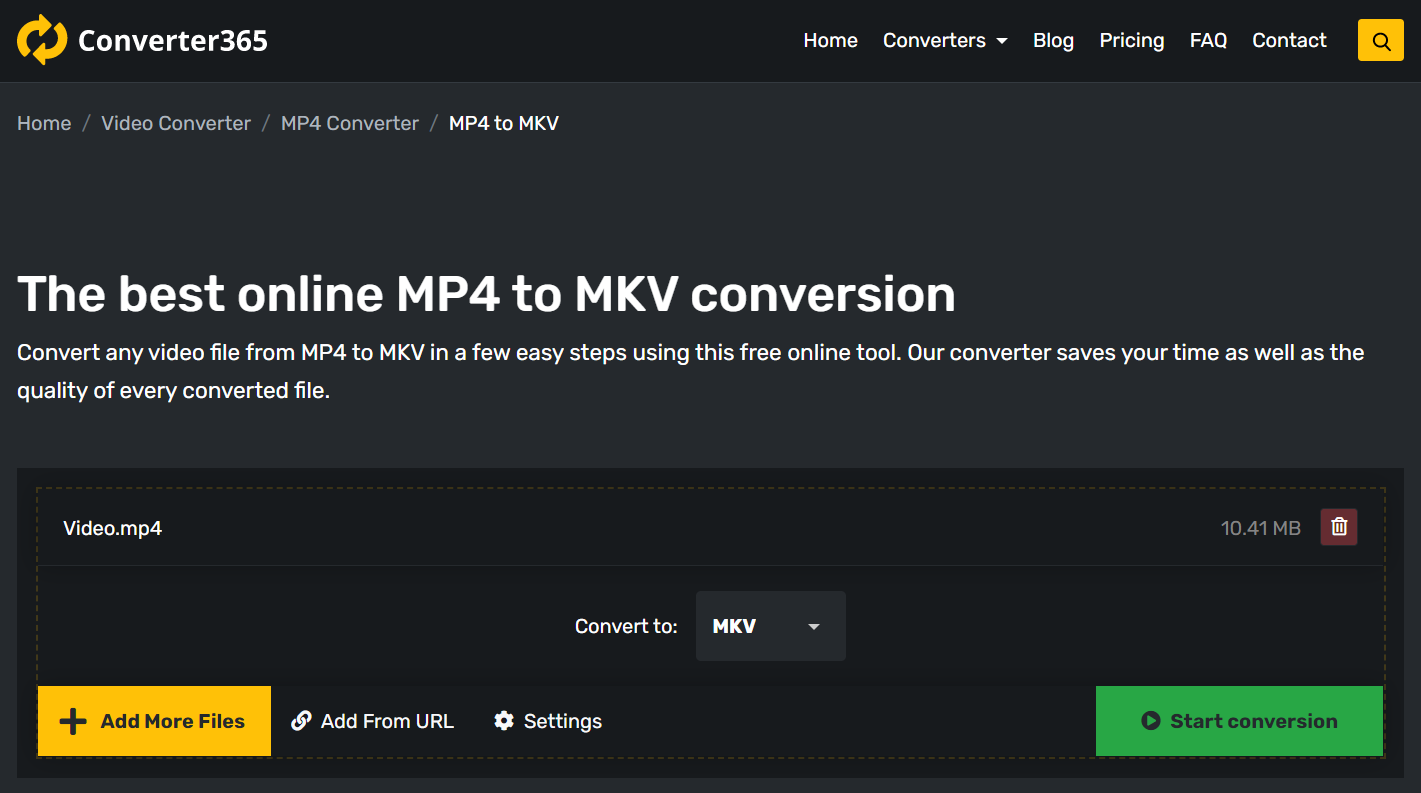
Converter365 is a free online tool you can use on any OS without installation or registration. And the number of available formats for free conversion is unmatched. Also, it has support for large files so that you can convert video files easily. See for yourself how easy it is to convert any format in three easy steps. For our example, we converted MP4 to an MKV file.
Step 1
Add up to ten video MP4 files for conversion to Converter365 designated area by drag and drop method.
Step 2
Press the Start Conversion button to begin converting your MP4 files to MKV format.
Step 3
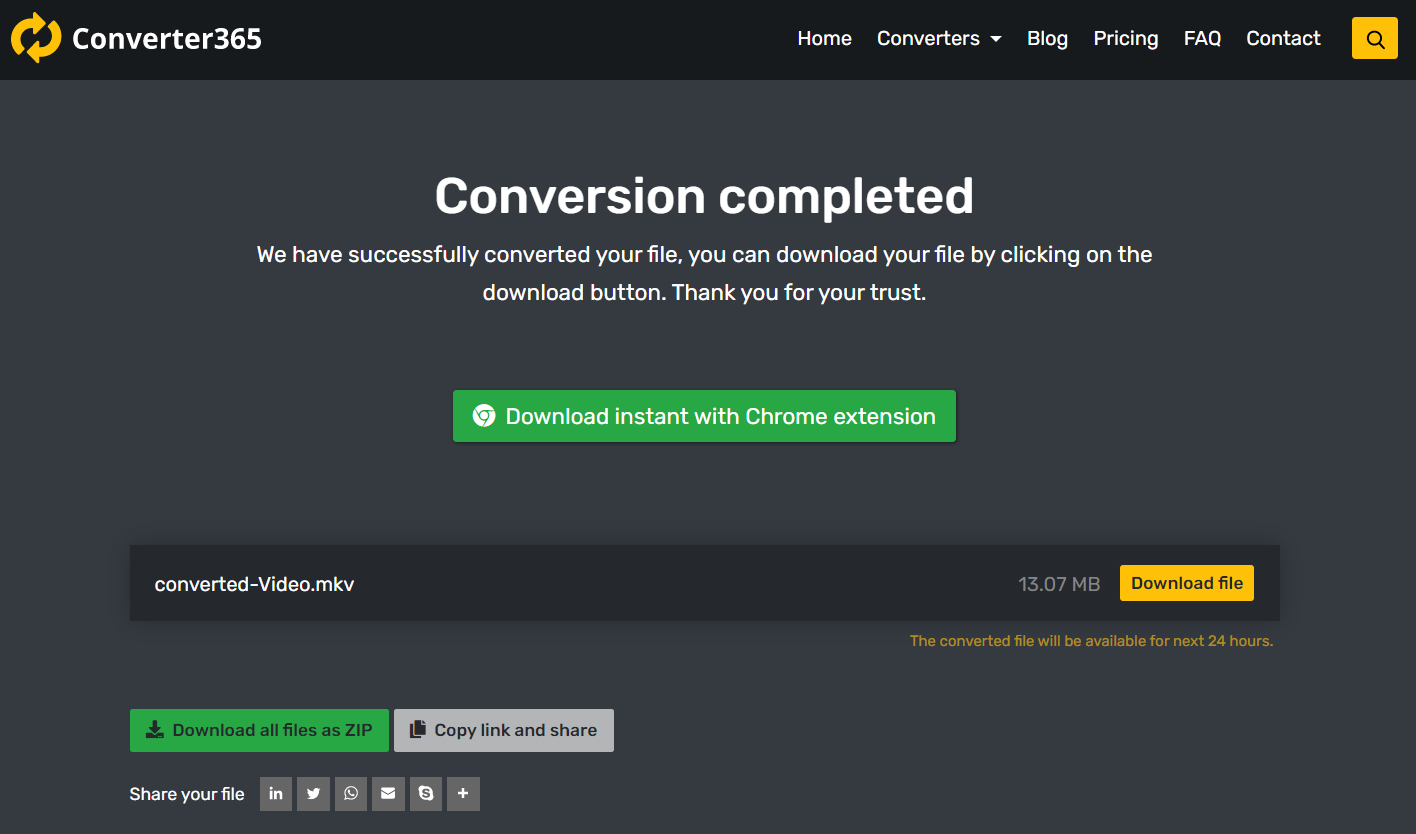
Wait for the upload and conversion process to finish, and do not close the Converter365 window. The download link with your MKV files will appear shortly in the same window.
Final Word
Even though Adobe premiere Pro seems complicated, we hope you learned how to export Adobe Premiere to MP4 in these easy steps. Also, now you know why most popular YouTubers use this professional software for video editing. If you need only to export or convert your video format to other formats, there are plenty of free alternatives to explore.
Our recommendation is a free online video Converter365. You can convert up to ten large files for free on Mac, Windows, or any OS with a web browser. Try this tool now and see why it is at the top of the free online converters list.

